
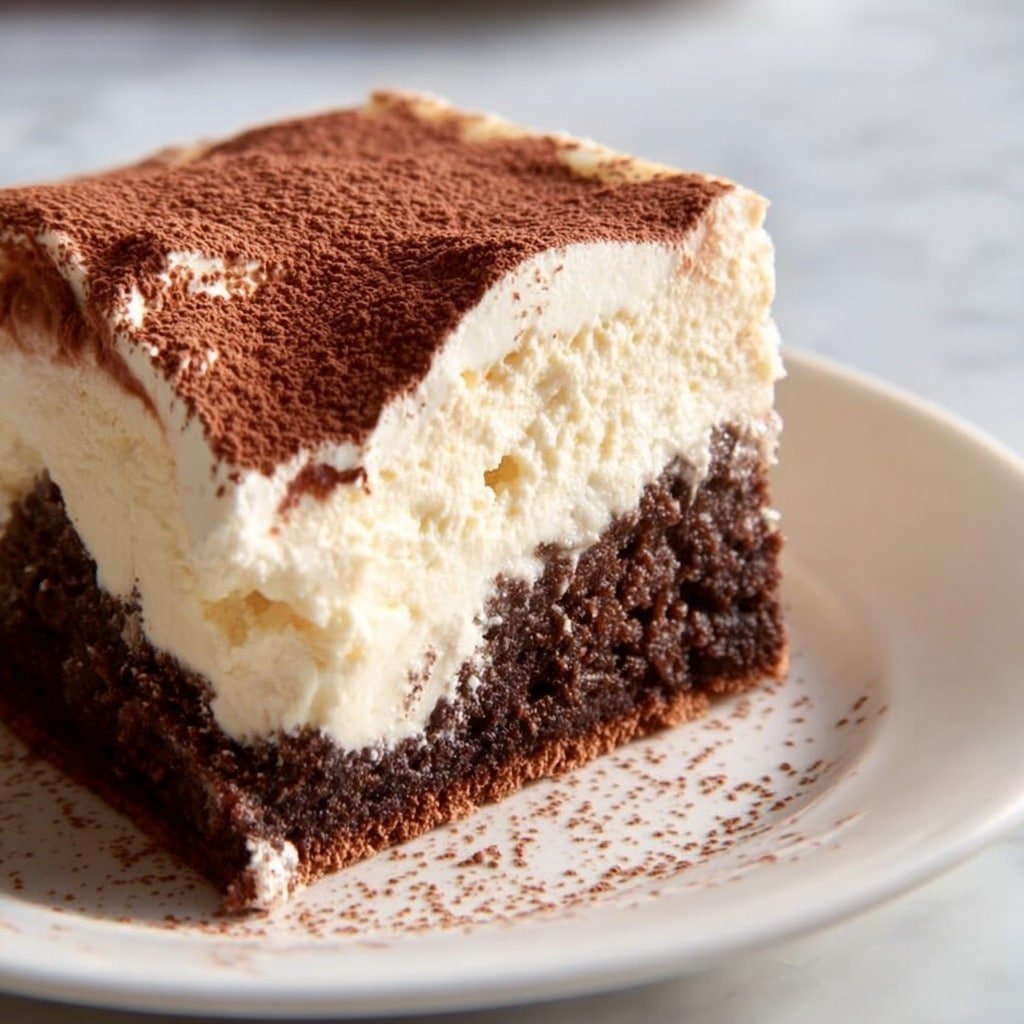
I’ll never forget the first time I brought these Gluten Free Tiramisu Brownies Recipe to a family gathering. The way the rich, fudgy chocolate base melts into that airy, creamy tiramisu topping had everyone asking for seconds—and even thirds. It’s that delightful combo of textures and flavors that just sticks with you, especially if you’re gluten sensitive like me or someone you love. I usually make these when I want to impress without spending hours fussing over complex desserts.
Why This Recipe Shines
- Flavor Harmony: Combines deep cocoa with creamy mascarpone and espresso for a perfect pairing.
- Easy Assembly: Simple steps that even beginner bakers can follow confidently.
- Texture Play: The fudgy brownie base contrasts beautifully with the light, fluffy tiramisu topping.
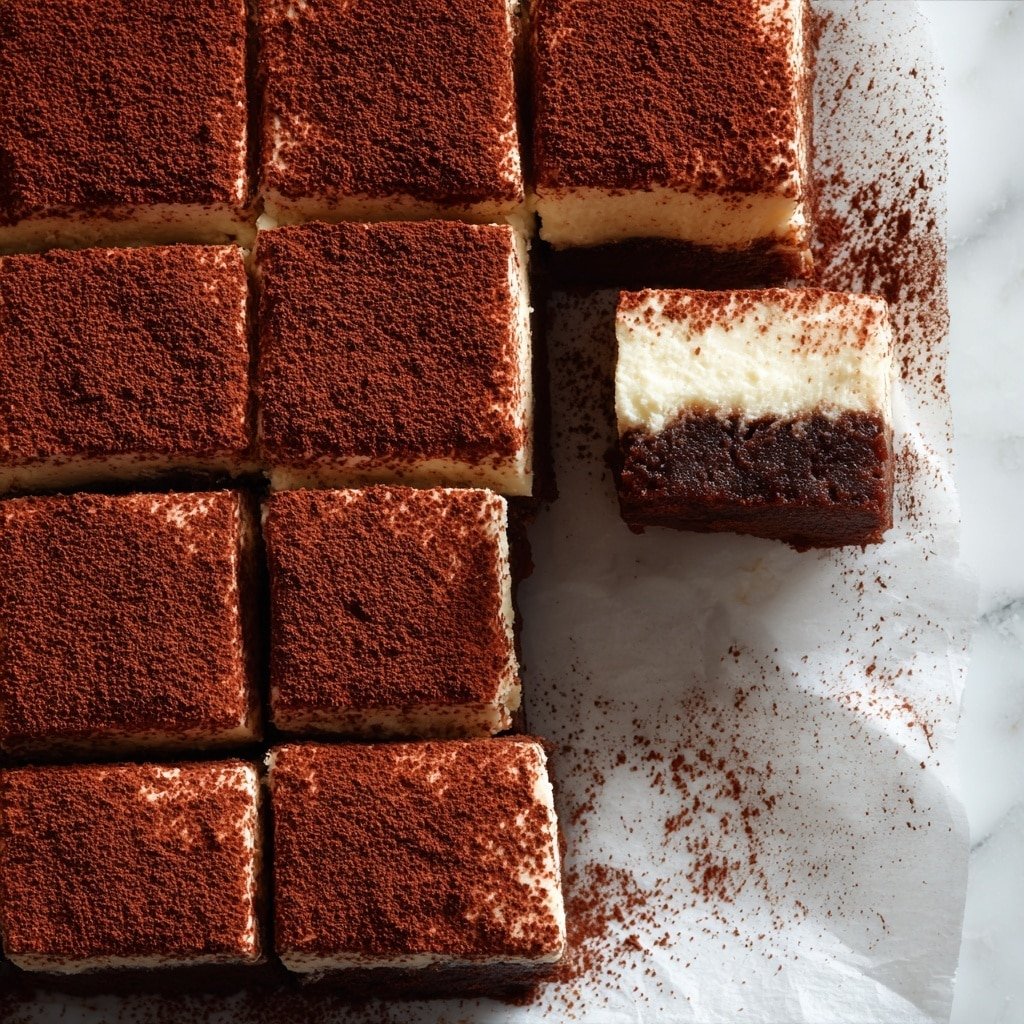
- Showstopper Finish: A dusting of cocoa powder gives it that classic, elegant tiramisu look.
What makes this Gluten Free Tiramisu Brownies Recipe so special is how well it marries two classic dessert worlds: the chocolaty goodness of a brownie and the cool, dreamy tiramisu cream that tops it. The espresso powder in the batter and the brewed coffee in the topping bring a rich aroma and depth that wakes up your taste buds instantly. Plus, the dark hue of the cocoa powder dusting on top sets the stage for a dessert that looks just as good as it tastes—truly a feast for all the senses.
Don’t worry if you’re new to gluten free baking or tiramisu-style desserts—I’ve got you. I’ll guide you through each step with easy-to-follow instructions and handy tips so you’ll nail this the first time. By the end, you’ll have a batch of luscious brownies ready to impress family, friends, or just your sweet tooth. Ready to get baking? Let’s dive right in.
Ingredients You’ll Be Working With
Before you get started, a little tip on measuring: use a digital scale if you can for the most consistent results, or spoon and level your dry ingredients to avoid packing. The exact amounts you need are all laid out in the recipe card down below.
- Gluten free all-purpose flour: The foundation for these brownies; ensures a tender crumb without gluten.
- Cocoa powder: Brings deep chocolate flavor and richness; unsweetened is best.
- Espresso powder: Adds a subtle coffee depth that enhances the chocolate notes.
- Sugar: Sweetens and balances the bitterness of cocoa; granulated sugar works great.
- Eggs: Act as binder and leavener; room temperature yields better texture and rise.
- Melted butter: Adds moisture and richness; make sure it’s cooled to avoid cooking eggs.
- Vanilla extract: Rounds out the flavors with warm, aromatic notes.
- Mascarpone cheese: The star of the creamy tiramisu layer; be sure to use it at room temperature for smoothness.
- Heavy whipping cream: Whipped to stiff peaks for that light, airy cream topping.
- Powdered sugar: Sweetens without graininess; perfect for the tiramisu cream.
- Brewed espresso or strong coffee: Brings authentic tiramisu flavor; cooled before folding in.
- Unsweetened cocoa powder (for dusting): The finishing touch; dust generously.
If you need to swap, try dairy-free butter alternatives and coconut or almond-based mascarpone substitutes for a dairy-free twist. Just keep your espresso powder and strong coffee to keep that rich tiramisu flavor.
Chef’s Note
You’ll find the complete list of ingredients with exact measurements in the printable recipe card at the bottom of this post.
Tools You’ll Need
- 8×8 inch baking pan: Perfect size for uniform brownie thickness and easy slicing.
- Parchment paper: Ensures easy removal of brownies—no stickiness here.
- Mixing bowls: At least two; keep wet and dry ingredients separate before combining.
- Electric mixer or whisk: For whipping the heavy cream to stiff peaks smoothly.
- Measuring cups and spoons: Precise measuring helps keep brownies consistent every time.
- Sieve or fine mesh strainer: To dust the top evenly with cocoa powder.
- Spatula: For gentle folding to keep the tiramisu cream light and fluffy.
How to Make Gluten Free Tiramisu Brownies Recipe
Let’s get all your ingredients prepped and your oven warmed up. This recipe comes together pretty quickly, but patience during chilling makes all the difference in texture and flavor development.
- Preheat and prep the pan: First, set your oven to 350°F (175°C). Line an 8×8 inch baking pan with parchment paper, letting some hang over the edges for easy lifting later.
- Mix wet ingredients: In a medium bowl, whisk together melted butter (make sure it’s cooled), sugar, eggs, and vanilla extract until smooth and glossy. This gives your brownies that rich base.
- Combine dry ingredients: In another bowl, sift together gluten free all-purpose flour, cocoa powder, and espresso powder to remove lumps and evenly distribute flavors.
- Make the brownie batter: Slowly add the dry ingredients to the wet mixture, stirring just until combined. Don’t overmix — you want a thick batter but keep it tender.
- Bake the brownies: Pour the batter into your prepared pan and smooth the surface with a spatula. Bake for 20–25 minutes. The brownies should look set but still slightly soft in the center. Let them cool completely before moving on.
- Prepare the tiramisu topping: Beat mascarpone cheese with powdered sugar and vanilla extract in a bowl until creamy and smooth. In a separate bowl, whip the heavy cream to stiff peaks. Gently fold the whipped cream into the mascarpone mixture for a light, airy texture.
- Add coffee magic: Stir brewed espresso or strong coffee into the tiramisu cream carefully — fold just enough to combine without losing fluffiness.
- Assemble and chill: Spread the tiramisu cream evenly over the cooled brownies. Cover and chill in the fridge for at least 2 hours to let flavors meld and set.
- Finish with cocoa dusting: Right before serving, sift unsweetened cocoa powder generously on top for that classic tiramisu look and a slight bittersweet finish.
Kitchen Wisdom
- Tip 1: Don’t skip chilling the brownies fully — it makes spreading the tiramisu cream much easier and prevents melting.
- Tip 2: Use cooled, not hot, espresso or coffee to keep the cream stable and airy.
- Tip 3: Be gentle folding the whipped cream into mascarpone to keep that luscious light texture.
- Tip 4: For clean slices, use a sharp knife warmed in hot water and wiped dry between cuts.
How to Serve
Flavor Boosters
You can elevate the Gluten Free Tiramisu Brownies Recipe with some extra touches like shaved dark chocolate or a few espresso beans on top for crunch and a pop of coffee flavor. A light drizzle of chocolate or coffee syrup pairs nicely if you want a little more indulgence. For a fresh twist, try adding a sprinkle of cinnamon or a hint of orange zest into the tiramisu cream.
Perfect Pairings
Serve your brownies alongside a cup of freshly brewed espresso, cappuccino, or even a glass of sweet Marsala wine to echo the tiramisu inspiration. If you want something refreshing, a simple glass of cold milk or herbal tea balances the richness well. These brownies also pair beautifully with fresh berries to cut through the creamy, chocolatey layers.
Presentation Touches
Cut your brownies into neat squares and arrange them on a pretty platter, dusting cocoa powder moments before serving so it stays fresh and vibrant. For gifting, wrap individual pieces in parchment and tie with a ribbon—they make a thoughtful, elegant homemade treat. For parties, consider layering the tiramisu cream in mini glass jars with brownie chunks for an easy, elegant individual dessert.
Variations & Easy Swaps
- Dairy-free: Use vegan butter and coconut cream whipped in place of heavy cream; find dairy-free mascarpone alternatives.
- Extra chocolate: Fold in mini chocolate chips into the brownie batter before baking.
- Nutty twist: Add toasted chopped hazelnuts or almonds either in the batter or sprinkled on top.
- Flavor boost: Stir a teaspoon of orange extract or amaretto liqueur into the tiramisu cream.
- Lower sugar: Substitute a natural sweetener like coconut sugar or erythritol for granulated and powdered sugars.
- Make it mini: Use a mini muffin tin for bite-sized tiramisu brownies perfect for serving at gatherings.
Make-Ahead, Storage & Reheating
- Make ahead: Prepare the brownies and tiramisu topping separately and assemble at least 2 hours before serving for best texture.
- Storage: Keep covered in the refrigerator for up to 4 days—best enjoyed chilled.
- Freezing: Not recommended due to cream topping, but you can freeze baked brownie base alone, wrapped tightly, up to 1 month.
- Reheating: Serve chilled for perfect texture—reheating isn’t ideal as it changes the tiramisu cream consistency.
FAQs
- Can I make this recipe nut free?
Yes! This recipe doesn’t include nuts by default, but be sure your gluten free flour blend is processed in a nut-free facility if allergies are a concern. - What if I don’t have espresso powder?
You can substitute instant coffee granules, but espresso powder packs a bolder, richer flavor that complements chocolate best. - Can I use regular flour instead of gluten free?
Absolutely. Just swap 1:1 with all-purpose flour if gluten isn’t a concern for you. - How do I avoid lumps in the tiramisu cream?
Use room temperature mascarpone and sift powdered sugar. Whip the cream separately to stiff peaks before folding gently. - Can I prepare the tiramisu topping a day ahead?
Yes, but fold the whipped cream in right before assembling to keep the topping airy and fresh.
Gluten Free Tiramisu Brownies Recipe

These Gluten Free Tiramisu Brownies combine a fudgy chocolate base with a creamy tiramisu topping, offering a deliciously rich and elegant dessert perfect for any occasion. The brownies have a deep chocolate espresso flavor topped with a smooth mascarpone cream, chilled and dusted with cocoa powder for a classic finish.
- Prep Time: 25 minutes
- Cook Time: 25 minutes
- Total Time: 2 hours 15 minutes
- Yield: 9 brownies
- Category: Dessert
- Method: Baking
- Cuisine: Fusion
- Diet: Gluten Free
Ingredients
Brownie Base
- 1/2 cup gluten free all-purpose flour
- 1/3 cup cocoa powder
- 1 tablespoon espresso powder
- 1 cup sugar
- 2 large eggs
- 1/2 cup melted butter
- 1 teaspoon vanilla extract
Tiramisu Topping
- 1 cup mascarpone cheese
- 3/4 cup heavy whipping cream
- 1/3 cup powdered sugar
- 1/4 cup brewed espresso or strong coffee, cooled
- 1 teaspoon vanilla extract
Finishing
- Unsweetened cocoa powder (for dusting)
Instructions
- Preheat and Prepare Pan: Preheat the oven to 350°F (175°C) and line an 8×8 inch baking pan with parchment paper for easy removal of the brownies later.
- Mix Wet Ingredients: In a bowl, combine the melted butter, sugar, eggs, and vanilla extract. Mix thoroughly until the mixture is smooth and well blended.
- Whisk Dry Ingredients: In a separate bowl, whisk together the gluten free all-purpose flour, cocoa powder, and espresso powder ensuring there are no lumps.
- Combine Batter: Gradually add the dry ingredients to the wet ingredients and mix until a thick, uniform batter forms.
- Bake Brownie Base: Pour the batter into the prepared baking pan, smoothing the surface evenly. Bake for 20 to 25 minutes or until a toothpick inserted comes out with a few moist crumbs. Allow the brownies to cool completely before proceeding.
- Prepare Tiramisu Cream: In a clean bowl, beat mascarpone cheese with powdered sugar and vanilla extract until creamy and smooth. In another bowl, whip the heavy cream to stiff peaks, then gently fold it into the mascarpone mixture to create a light and airy cream.
- Add Coffee Flavor: Slowly fold in the cooled brewed espresso or strong coffee into the mascarpone cream mixture to infuse the tiramisu flavor evenly.
- Assemble the Dessert: Spread the tiramisu cream evenly over the cooled brownie base to form a smooth layer.
- Chill: Refrigerate the brownies with tiramisu topping for at least 2 hours to allow the flavors to meld and the cream to set.
- Serve: Dust the chilled tiramisu brownies generously with unsweetened cocoa powder, slice into 9 squares, and serve chilled.
Notes
- Chill the brownies fully before adding the tiramisu layer for best layering results.
- Use room temperature mascarpone cheese to avoid lumps and achieve a smooth cream texture.
- Store leftovers in an airtight container in the refrigerator for up to 4 days for optimal freshness.