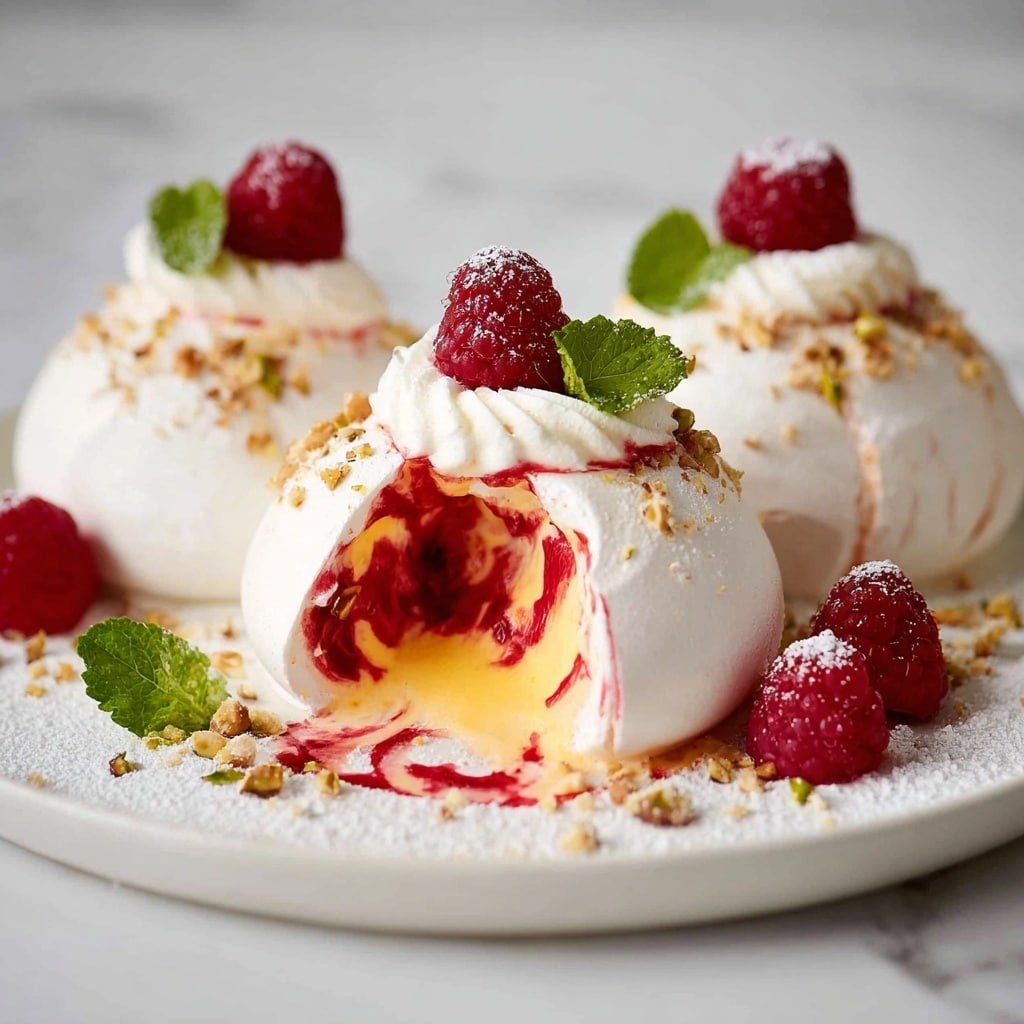
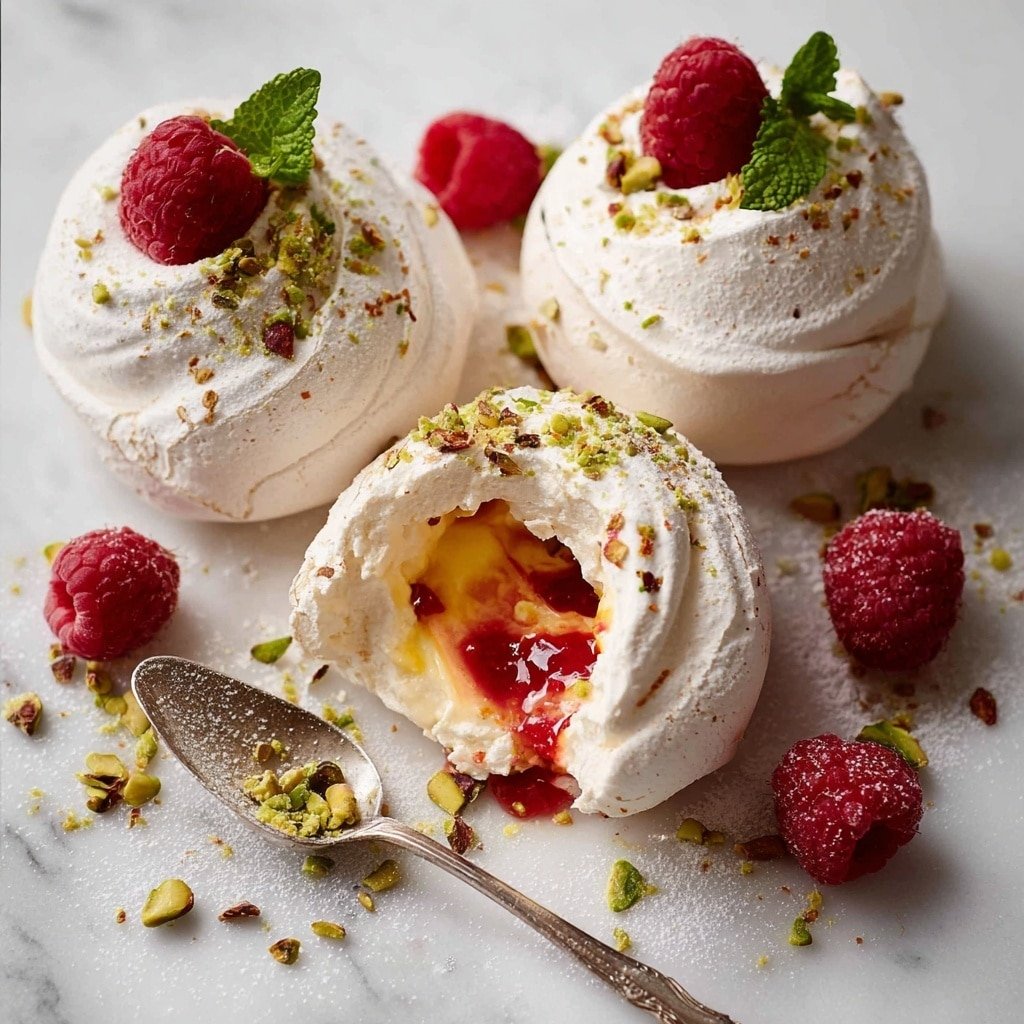
I still remember the first time I tried these Pavlova Bombs: Mini Pavlova Balls Filled with Lemon Curd, Raspberry Coulis, and Whipped Cream Recipe. I was hosting a casual dinner with friends, and they looked almost too pretty to eat—tiny domes of crisp meringue, so innocent and delicate. But the moment we smashed into them, the burst of tangy lemon curd, vibrant raspberry coulis, and lush whipped cream caught everyone by surprise. The contrasting textures and flavors made it an instant favorite, and honestly, I keep making them whenever I want to impress with minimal fuss.
Why This Recipe Shines
- Flavor Harmony: The sharp lemon curd, sweet-tart raspberry coulis, and airy whipped cream dance beautifully with the crisp and soft pavlova shell.
- Easy Assembly: Once baked, filling these mini pavlovas is a breeze with simple piping—you’ll love how quickly they come together.
- Texture Play: Crispy outside meets marshmallowy center and creamy fillings for a bite full of surprises.
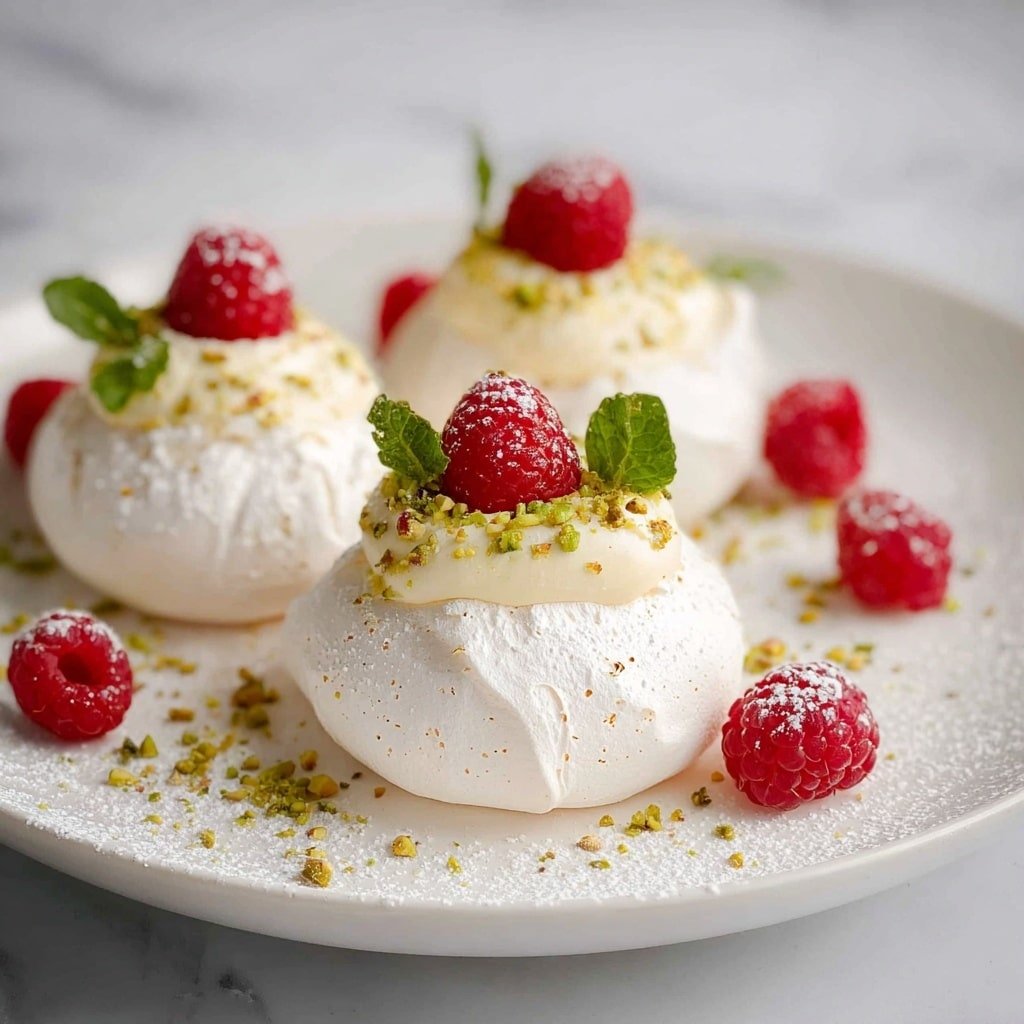
- Showstopper Finish: Topping with pistachios, raspberries, and a dusting of icing sugar elevates these desserts for any occasion.
What makes Pavlova Bombs: Mini Pavlova Balls Filled with Lemon Curd, Raspberry Coulis, and Whipped Cream Recipe so special is how approachable it is despite its elegant look. The aroma of baked meringue filling your kitchen, the soft pastel colors of the lemon and raspberry, and the texture contrast will have you hooked. Plus, you can easily swap the fillings to suit your mood — think passionfruit pulp or chocolate sauce. Whether it’s a sunny afternoon tea or a festive dessert, these mini pavlovas fit right in.
If you’re new to making meringue or fear it might be tricky, don’t worry. I’ll walk you through every step so you get it right the first time. From whipping egg whites to the perfect bake and filling technique, this guide covers it all — no baking intimidation here, just delicious results.
Ingredients You’ll Be Working With
Before you dive in, it’s helpful to measure ingredients precisely for the best pavlova texture. Exact quantities are detailed in the recipe card at the end, but here’s a quick overview of what you’ll need and why.
- Egg whites: The foundation of our meringue; use fresh and separate carefully for best volume.
- Caster sugar: Superfine sugar ensures smooth, glossy meringue without graininess.
- Cornflour (cornstarch): Stabilizes the pavlova shell and keeps it crisp.
- White vinegar: Adds acidity that helps set the meringue and prevents cracking.
- Lemon curd: The zesty, creamy filling that brightens every bite—can be homemade or store-bought.
- Raspberry coulis: Tart and vibrant, it cuts through the creaminess and sweetness.
- Heavy cream: Whips up fluffy cream to top and fill these Pavlova Bombs.
- Caster sugar (for cream): Sweetens the whipped cream gently.
- Vanilla extract: Rounds out the whipped cream with subtle warmth.
- Unsalted pistachios: Adds crunch and color as garnish.
- Fresh raspberries and mint sprigs: For a beautiful, fresh finish.
- Icing sugar: Dusting for an elegant touch.
If you need substitutions, you can swap white vinegar for lemon juice, or use coconut cream to make a dairy-free whipped cream alternative. Just keep in mind the texture differences this might bring.
Chef’s Note
You’ll find the complete list of ingredients with exact measurements in the printable recipe card at the bottom of this post.
Tools You’ll Need
- Stand mixer or electric hand mixer: Essential for whipping egg whites to stiff peaks quickly and easily.
- Piping bags: For neatly shaping the pavlova shells and piping in fillings without mess.
- Baking trays lined with parchment paper: Prevents sticking and helps shape the domes.
- Offset spatula or butter knife: Handy for smoothing pavlova domes.
- Sharp small knife: For cutting precise holes to fill the pavlovas.
- Chopstick or skewer: To gently hollow out the meringue for fillings.
- Muffin tin (optional): Keeps pavlova balls stable while you work on filling them.
How to Make Pavlova Bombs: Mini Pavlova Balls Filled with Lemon Curd, Raspberry Coulis, and Whipped Cream Recipe
Ready to get started? Let’s set the stage for baking perfect pavlova bombs — crisp on the outside and marshmallow-soft inside. Here’s the simple step-by-step to guide you.
- Preheat the oven and prepare: Set your oven to 150°C / 325°F. Line two baking trays with parchment paper and secure the corners with a dab of leftover meringue so they don’t slip around.
- Whip the egg whites: Separate your egg whites (from 3 large eggs) while cold—they separate easier that way. Let the whites sit at room temperature for 15 minutes to fluff up better. Beat on high for 1 minute.
- Add sugar slowly: Gradually pour in 2/3 cup caster sugar over about a minute while still beating. Keep beating for 5 full minutes until shiny and stiff, with no graininess when rubbed between fingers.
- Incorporate stabilizers: Add 1/4 tsp white vinegar and 1 1/4 tsp cornflour, then beat for another 30 seconds. These help avoid cracks and keep the texture spot-on.
- Pipe the meringue domes: Transfer mixture to a large piping bag with about a 2cm opening. Pipe five tall mounds on your trays, smoothing each with an offset spatula to form domes that are slightly taller than wide (about 4 cm wide, 6.5 cm tall).
- Bake low and slow: Immediately reduce oven temperature to 110°C / 225°F (or 100°C fan). Bake both trays for 1 hour 30 minutes until the shells are dry to touch and lightly crisp. If they’re still sticky, bake a bit longer.
- Cool inside the oven: Turn the oven off and leave pavlovas inside to cool completely — ideally for at least 3 hours or overnight. This sets their delicate shell perfectly while keeping the center marshmallowy.
- Prepare fillings: While the pavlovas bake and cool, make your lemon curd and raspberry coulis or use store-bought versions. Whip cold cream with caster sugar and vanilla until soft peaks form just before assembling.
- Create the filling cavity: Pop a pavlova bomb upside down into a muffin tin or stable surface. Using a small sharp knife, carefully cut a 1cm hole in the base. Gently use a chopstick to hollow out the center slightly, making space for the fillings.
- Fill and plug: Pipe about 1 1/2 tsp raspberry coulis into the hole, then add 2-3 tsp lemon curd. Fill the hole with whipped cream to seal the fillings inside.
- Plate and decorate: Spread a dollop (~2 tbsp) of whipped cream on your serving plate, place the Pavlova Bomb on top to anchor it. Pipe more cream on top, then garnish with a raspberry, mint sprig, chopped pistachios, and a sprinkle of icing sugar.
- Smash and serve: Encourage digging in immediately! Smash the dome with a spoon for a burst of textures and flavors all at once—crispy meringue, soft marshmallow interior, tangy lemon, tart raspberry, and creamy whipped topping.
Kitchen Wisdom
- Tip 1: Always use room temperature egg whites to achieve maximum volume and glossy meringue.
- Tip 2: Baking low and slow ensures the shell crisps without browning or cracking.
- Tip 3: Cool the pavlovas inside the turned-off oven to prevent sudden temperature changes that could cause cracks.
- Tip 4: Assemble just before serving because the whipped cream softens the shell if left too long.
How to Serve
Flavor Boosters
Try dusting with finely grated lemon zest for an extra citrus punch or drizzle a little passionfruit pulp over the top for tropical brightness. A sprinkle of toasted coconut flakes adds a lovely crunch and subtle sweetness that pairs beautifully with the lemon and raspberry.
Perfect Pairings
Pavlova Bombs: Mini Pavlova Balls Filled with Lemon Curd, Raspberry Coulis, and Whipped Cream Recipe taste fantastic with a light sparkling wine or a fruity rosé. For non-alcoholic options, a chilled jasmine tea or sparkling lemonade complements the dessert’s zesty notes.
Presentation Touches
Serve each Pavlova Bomb on a small dessert plate with a sprig of mint and a dusting of icing sugar for elegance. For parties, arrange them on a tiered stand to wow your guests. They also make a charming homemade gift when wrapped in cellophane with a pretty ribbon—guaranteed to brighten anyone’s day.
Variations & Easy Swaps
- Make it dairy-free by using coconut cream whipped until fluffy instead of heavy cream.
- Swap lemon curd for passionfruit curd for a tangy tropical twist.
- Add chopped fresh kiwi or mango inside with the coulis for extra fruity bursts.
- Use chocolate ganache or caramel sauce as a decadent filling alternative.
- Replace pistachios with toasted almonds or hazelnuts for different nutty notes.
Make-Ahead, Storage & Reheating
- Make pavlova shells up to 2 days ahead and store in an airtight container in a cool, dry place.
- Coulis and curd can be prepared a few days ahead and kept refrigerated or frozen for up to 3 months.
- Whipped cream is best made just before serving, or stabilize it to whip a day in advance.
- Assemble Pavlova Bombs shortly before serving to keep shells crisp and cream fresh.
FAQs
- Q: Can I use carton egg whites for the pavlova?
A: It’s best to use fresh egg whites; carton whites usually don’t whip up as well and can affect texture. - Q: How do I know when the pavlova shells are done?
A: They should feel dry and crisp on the outside and lift easily from the parchment with no stickiness. - Q: Can I make these gluten-free?
A: Absolutely! The recipe is naturally gluten-free since it’s based on meringue. - Q: How long do assembled Pavlova Bombs last?
A: They’re best eaten immediately after assembling, as the cream softens the shell quickly. - Q: Can I freeze the pavlova shells?
A: Yes, store cooled shells airtight in the freezer for up to 3 months. Thaw completely before filling.
Pavlova Bombs: Mini Pavlova Balls Filled with Lemon Curd, Raspberry Coulis, and Whipped Cream Recipe

Pavlova Bombs are delightful mini pavlovas filled with tart lemon curd, bright raspberry coulis, and fluffy whipped cream. These crispy-on-the-outside, marshmallow-soft-on-the-inside meringue domes explode with colorful, tangy-sweet fillings when smashed, delivering a sensational flavor and texture experience. Perfect for impressing guests at parties or special occasions, these elegant dessert bombs are surprisingly easy to make and can be prepared ahead of time for stress-free entertaining.
- Prep Time: 25 minutes
- Cook Time: 1 hour 30 minutes
- Total Time: 6 hours (including cooling time)
- Yield: 5 pavlova bombs
- Category: Dessert
- Method: Baking
- Cuisine: Australian, New Zealand
Ingredients
Pavlova Balls:
- 80 ml / 1/3 cup egg whites (from 3 large eggs)
- 2/3 cup caster sugar (superfine sugar)
- 1 1/4 tsp cornflour (cornstarch)
- 1/2 tsp white vinegar
Fillings:
- Raspberry Coulis (homemade)
- Lemon Curd (made with the 3 leftover yolks)
- Other suggested fillings: passionfruit pulp, mango puree, chopped fruit, chocolate sauce
Whipped Cream:
- 1 cup heavy/thickened cream (cold)
- 1 1/2 tbsp caster sugar (superfine sugar)
- 1/2 tsp vanilla extract
Garnishes:
- 1 1/2 tbsp unsalted pistachios, finely chopped
- 5 small mint sprigs
- 20 fresh raspberries
- Icing sugar (powdered sugar), for dusting
Instructions
- Preheat Oven: Set the oven to 150°C / 325°F (all oven types) to prepare for baking the pavlova shells.
- Prepare Egg Whites: Separate 3 large cold eggs to obtain 80 ml (1/3 cup) of egg whites. Let the egg whites come to room temperature for 15 minutes to ensure they fluff properly.
- Add Sugar and Beat: Using a stand or electric mixer, beat egg whites on high for 1 minute. Slowly add 2/3 cup caster sugar over 1 minute while continuing to beat.
- Whip Meringue: Continue beating on high for 5 minutes until the mixture is glossy, fluffy, and no sugar grains can be felt when rubbed between your fingers. Then add 1/2 tsp white vinegar and 1 1/4 tsp cornflour. Beat for an additional 30 seconds to incorporate.
- Prepare Baking Trays: Dab a small amount of meringue on the corners of two baking trays and cover them with baking (parchment) paper.
- Pipe and Shape Mounds: Transfer meringue to a large piping bag with a 2cm (0.8 inch) opening. Pipe 5 mounds on the trays. Smooth each mound into a tall dome shape approximately 4 cm wide and 6.5 cm tall using an offset spatula or butter knife.
- Bake Pavlova Balls: Place trays immediately in the oven, reduce temperature to 110°C / 225°F (100°C fan). Bake for 1 hour 30 minutes or until dry to the touch and bases are set. If still sticky, bake longer as needed.
- Cool in Oven: Turn off oven and allow pavlova balls to cool completely inside for at least 3 hours or overnight (up to 10 hours) to ensure a crisp shell and marshmallow interior.
- Make Fillings: While pavlovas bake, prepare the lemon curd using the reserved yolks, and make raspberry coulis by simmering and straining raspberries. Chill both before use.
- Whip Cream: Just before serving, beat 1 cup cold heavy cream with 1 1/2 tbsp caster sugar and 1/2 tsp vanilla extract until soft peaks form (about 45 seconds in a stand mixer).
- Prepare for Assembly: Transfer raspberry coulis, lemon curd, and whipped cream into separate piping bags. Snip small openings to control piping flow.
- Make Access Hole: Place a pavlova ball upside down in a muffin tin. Carefully cut a 1cm hole in the base using a sharp knife. Insert a chopstick and gently push the marshmallow center aside to create space for filling.
- Fill Pavlova Bombs: Pipe 1 1/2 tsp raspberry coulis into the cavity, followed by 2-3 tsp lemon curd. Plug the hole by piping whipped cream into the opening.
- Plate and Garnish: Pipe approximately 2 tbsp whipped cream onto plates to anchor pavlova bombs. Place each pavlova on top, then pipe and spread more cream on top. Garnish with fresh raspberries, mint sprigs, chopped pistachios, and a dusting of icing sugar.
- Serve and Smash: Serve immediately. Encourage guests to smash into their pavlova bombs to experience the delightful explosion of textures and flavors.
Notes
- Doubling Recipe: You can double the recipe by piping onto two trays and baking simultaneously. Baking time and temperature remain the same.
- Egg Whites: Always measure egg whites for accuracy and use fresh eggs separated when cold. Avoid carton whites which don’t whip well. Let whites warm to room temperature before beating.
- Vinegar & Cornflour: Adding white vinegar and cornflour stabilizes the meringue and helps prevent cracks during baking.
- Stabilised Whipped Cream: Stabilised cream can be whipped a day ahead and stored in piping bags or airtight containers. This keeps it fluffy longer and speeds up assembly.
- Checking Pavlova Readiness: The shell should be dry and lightly crispy to the touch. Cooling inside the turned-off oven allows the center to remain marshmallowy while the shell fully sets.
- No Piping Bags? Use ziplock bags with the corner snipped or carefully spoon fillings into holes.
- Storage: Store cooled pavlova shells in an airtight container in a cool, dry place. Do not refrigerate to avoid shell disintegration. Best consumed within 2-3 days for optimal texture.
- Coulis and Curd: Both freeze well for up to 3 months. Thaw and mix before using.
- Prep Ahead: Prepare pavlova shells, fillings, and stabilised cream ahead of time. Assemble just before serving to keep the meringue crisp.